# redux basic
상태관리의 마술사
모든 자바스크립트로 만들어진 코드의 상태관리를 위하여 만들어진 framework
리덕스를 사용할 때 반드시 지켜야하는 규칙
- 하나의 상태를 가져야한다.
- 이뮤터블 해야한다.
- 순수 함수로서 작동해야한다.
# redux의 개념
# store
createStore(reducer)를 통해 만들어지는데 store는 reducer를 통해서 만들어진 새로운 state를 연결된 모든 components에게 알려준다.
이전의 스테이트 관리를 위하여 부모 component가 무거워 지는 것을 방지할 수 있다.
import { createStore } from "redux";
import rootReducer from "./modules";
import { Provider } from "react-redux";

const store = createStore(rootReducer);

ReactDOM.render(
  <Provider store={store}>
    <App />
  </Provider>,
  document.getElementById("root")
);
위에 코드 처럼 react에서는 redux를 이용해서 전체 어플리케이션에서 store에 저장된 state를 뿌려줄 수 있다.
Provider는 react에서 redux API들이 store에 접근 할 수 있도록도와주는 특수 API이다.
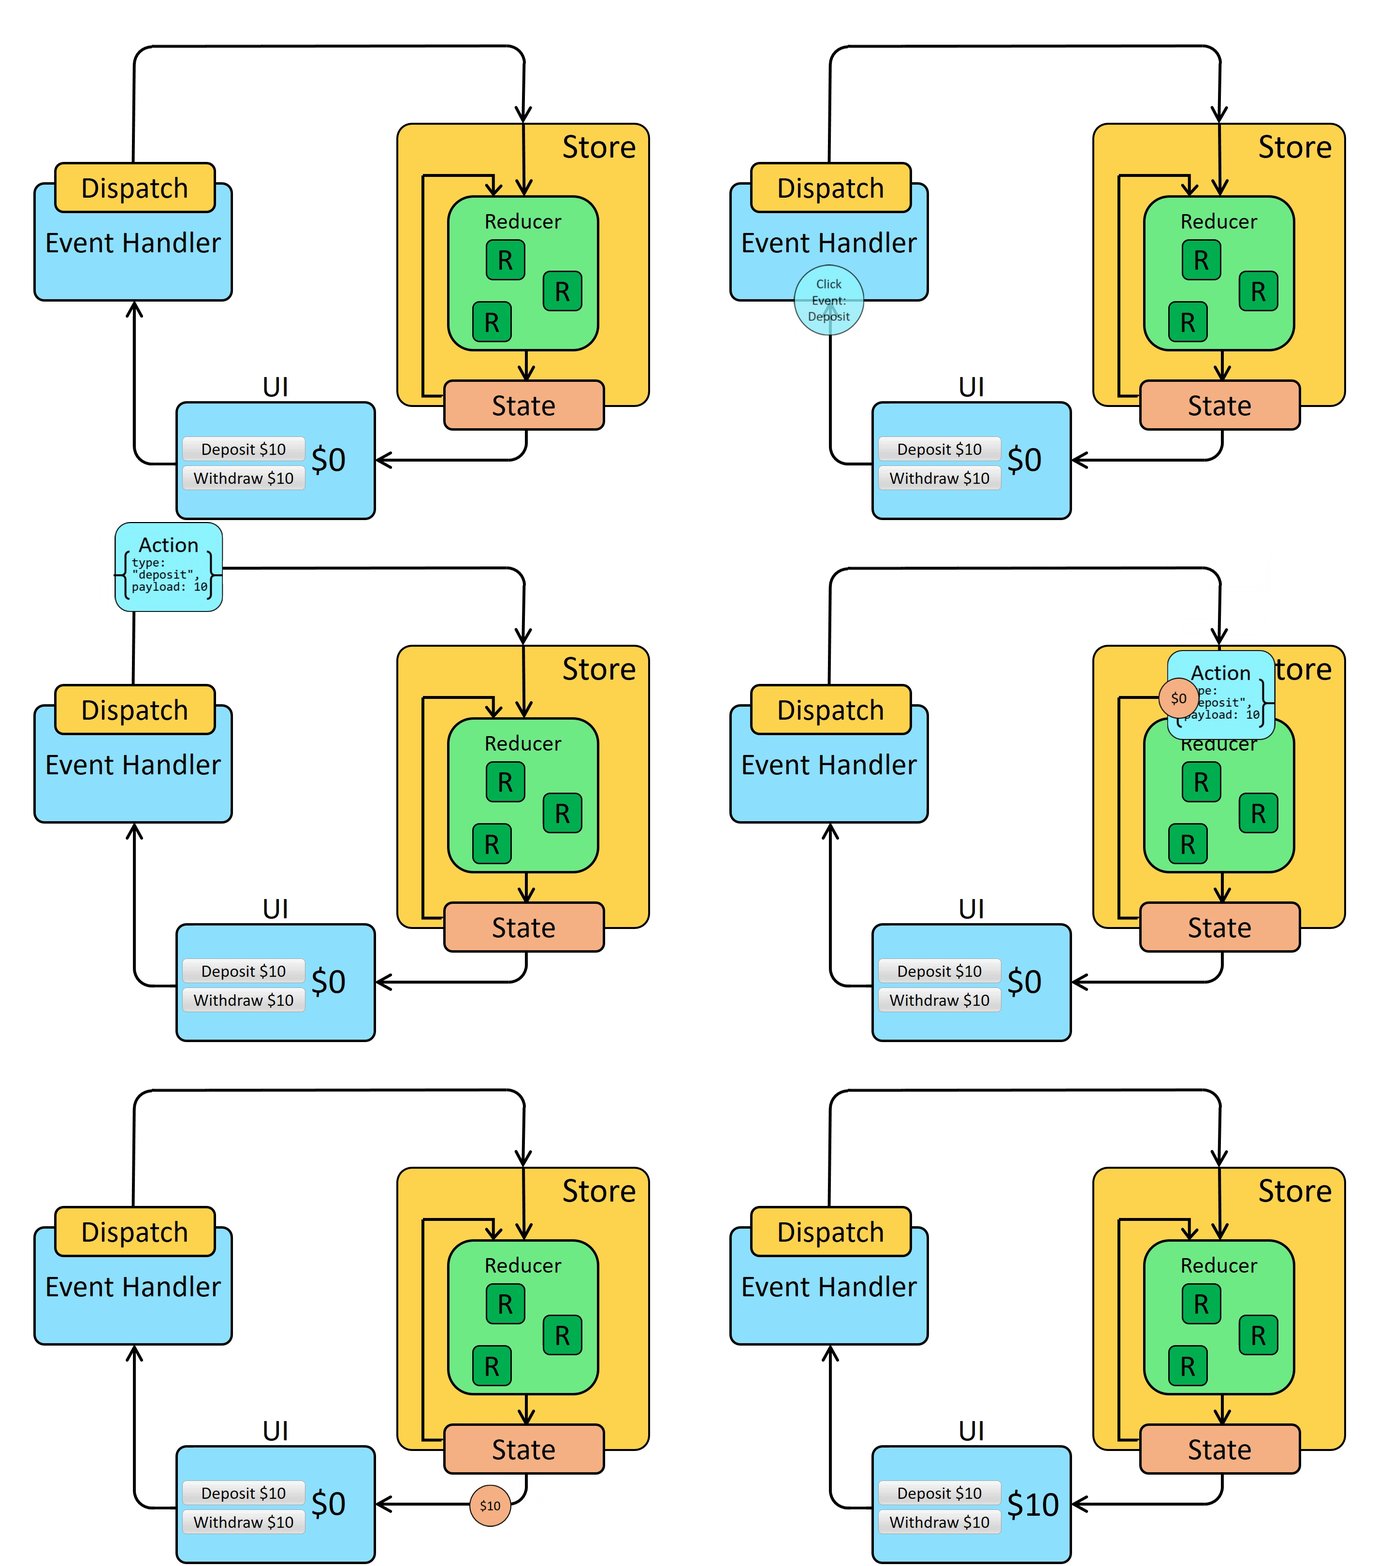
Redux의 기본 구조

# dispatch
dispatch는 Action을 reducer에 전달해 주는 역활을 한다고 생각하면 된다.
액션 객체는 일반적으로 아래와 같은 모습을하고 있다.(type이 type일 필요나 payload가 payload일 필요는 없다 redux는 javascript다)
{type: "EVENT_NAME", payload: {'state 외에 필요한 데이터 객체'}}
이러한 액션 객체를 리턴하는 방식으로 dispatch에 action 객체를 만들어서 전달할 사용할 함수를 만들 수 있다.
const addItem = (todoItem: string) => ({type: "ADD_ITEM", payload: todoItem}as const)
subscribe는 state를 구독할 수 있다.
# reducer
reducer(preState, Action)
reducer는 prevState와 Action 객체를 받아서 새로운(new) State를 뱉어준다.
function todoReducer(state: todoList = initialState, action: TodoActions) {
  switch (action.type) {
    case "ADD_ITEM":
      return state.concat({
        id: state.length + 1,
        text: action.payload,
        done: false
      });
    case "DONE_ITEM":
      return state.map(el => {
        el.done = el.id === action.payload ? !el.done : el.done;
        return el;
      });
    default:
      return state;
  }
}
이러한 과정을 통해 우리는 우리의 웹 소프트웨어의 상태를 한 번에 관리할 수 있게 된다.
코드를 조금더 추상화 하는데 도움이 되고, 특히 react에서의 상태관리를 state와 props에서 조금은 덜 종속적으로 코드를 디자인 할 수 있게된다.
실제로 react에서의 쓰임을 살펴보자.
# react redux
react에서의 상태 관리를 위하여 react 최상단 컴포넌트에 store를 만들어 전체 컴포넌트에서 redux 훅을 이용하여 state에 접근할 수 있다.
최상단 index.js에 Store를 만들어서 Provider를 통해 전체엡에 state를 가질 수 있도록 해준다.
import { createStore } from "redux";
import rootReducer from "./modules";
import { Provider } from "react-redux";

const store = createStore(rootReducer);

ReactDOM.render(
  <Provider store={store}>
    <App />
  </Provider>,
  document.getElementById("root")
);
Action 객체를 만들어 줄 함수를 만든다
export const addItem = (todoItem: string) => ({type: "ADD_ITEM", payload: todoItem}as const)
export const doneItem  = (id: number) => ({type: "DONE_ITEM", payload: id}as const)
타입스크립트에서는 해당 액션의 타입을 정의해 줘야 한다.
type TodoActions = ReturnType<typeof addItem> | ReturnType<typeof doneItem>;
reducer를 작성한다.
function todoReducer(state: todoList = initialState, action: TodoActions) {
  switch (action.type) {
    case "ADD_ITEM":
      return state.concat({
        id: state.length + 1,
        text: action.payload,
        done: false
      });
    case "DONE_ITEM":
      return state.map(el => {
        el.done = el.id === action.payload ? !el.done : el.done;
        return el;
      });
    default:
      return state;
  }
}
component에서 사용하기
우선 사용할 state를 component에 useSelector를 통해서 가져온다.
const todos = useSelector((state: RootState) => state.todos);
dispatch를 통해 reducer에 action 객체를 넘겨 주도록 준비시킨다.
const dispatch = useDispatch();
이벤트가 발생하였을때 action 객체를 만들어 넘겨주는 dispatch를 작성한다.
const onInput = (text: string) => {
  if (text) dispatch(addItem(text));
};

const onDone = (id: number) => {
  dispatch(doneItem(id));
};
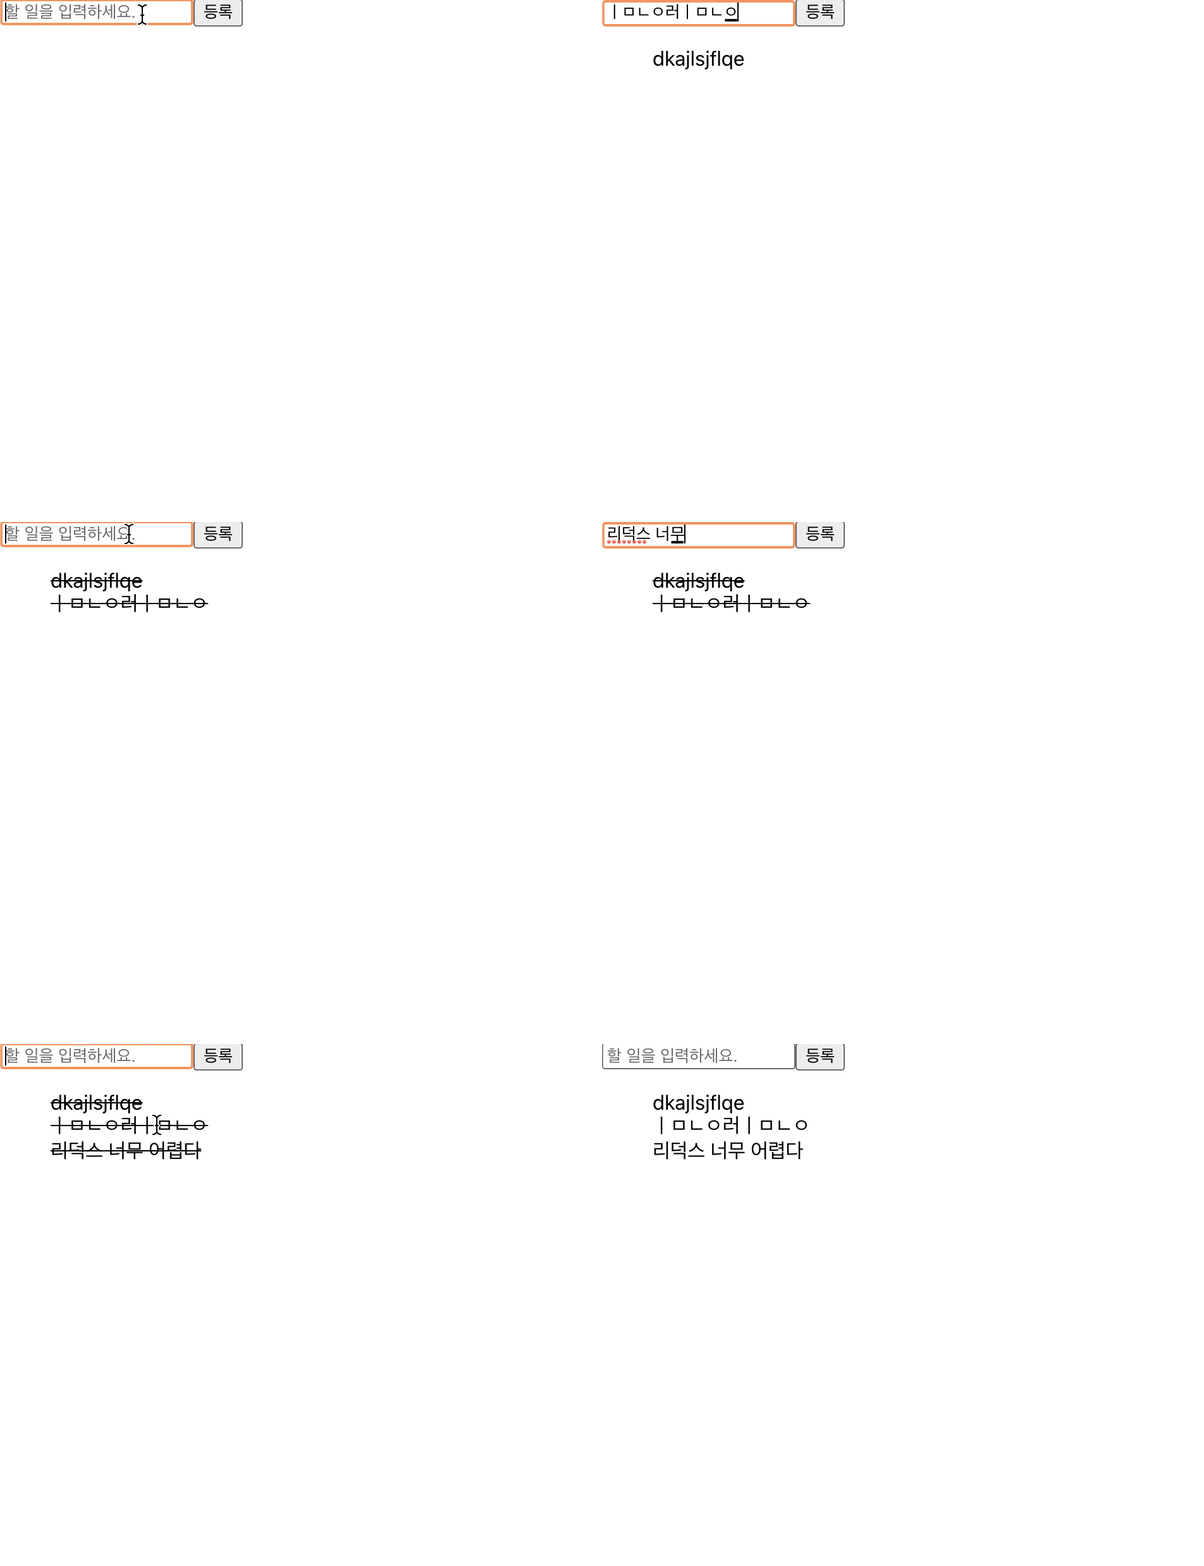
그럼 잘 작동할 것이다

다음은 redux를 통해 비동기작업을 할 수 있도록 돕는 thunk에 대하여 다뤄보도록 하겠다.
← react route DOM Oauth →
